Hosting your own email server at home is a great way to understand the principles of a full email solution and also a big factor to privacy concerns.
The only issue to hosting at home is that most home broadband ISPs use dynamic IP address assignments and these blocks of IP addresses are usually part of spam blocklists that Microsoft and Google refer to.
To confirm this you can go to MXToolBox and check your external IP Address across the blocklists.
A simple check for my IP showed that I was a part of two lists
- SORBS DUHL
- Spamhaus ZEN
SORBS DUHL is the key one here as this list contains a list of all dynamic IP addresses for ISPs and this is the one that would cause problems for us in the future.
To rectify this issue you can use an SMTP Relay which will send all email from the provider rather than sending from your home IP. Some of the popular providers for SMTP relays are
- SendGrid
- Amazon SES (Simple Email Service)
- Mailgun
All three services provide free tiers which will be more than enough for personal mailboxes.
I'll be using SendGrid for this example as I prefer the setup process and layout of the admin interface - it just makes things getting done easier.
Setup Process
SendGrid
The first thing to do is set up an account at SendGrid if you haven't already - SendGrid works by sending out emails against custom domains that have been authenticated.
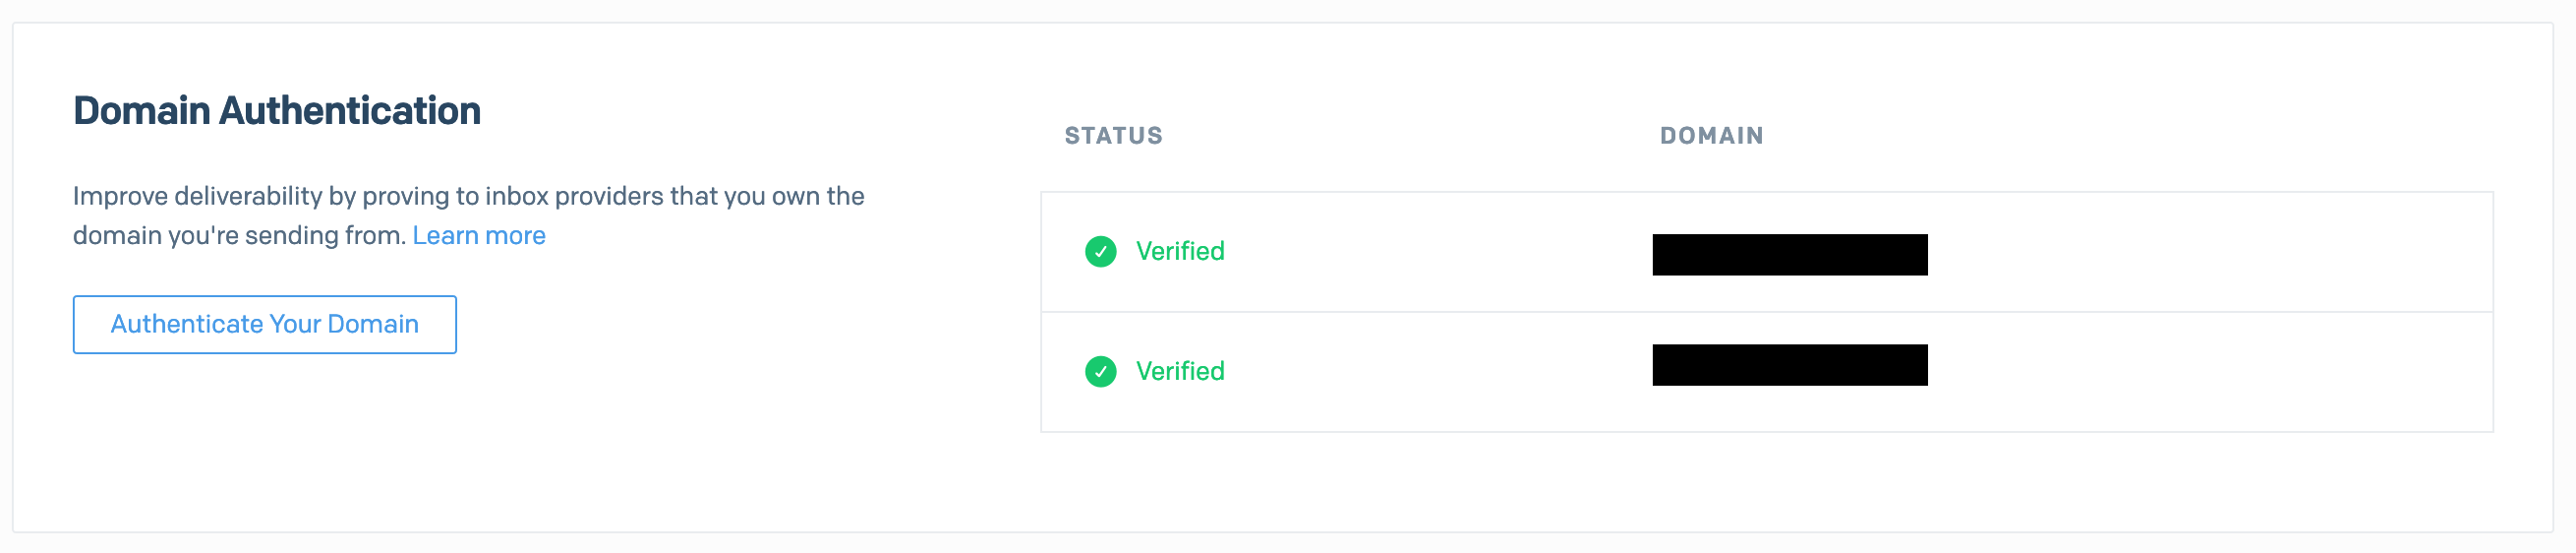
To do so access SendGrid and navigate to Settings > Sender Authentication this will list all domains that have been auhtenticated with SendGrid and allow sending from them.
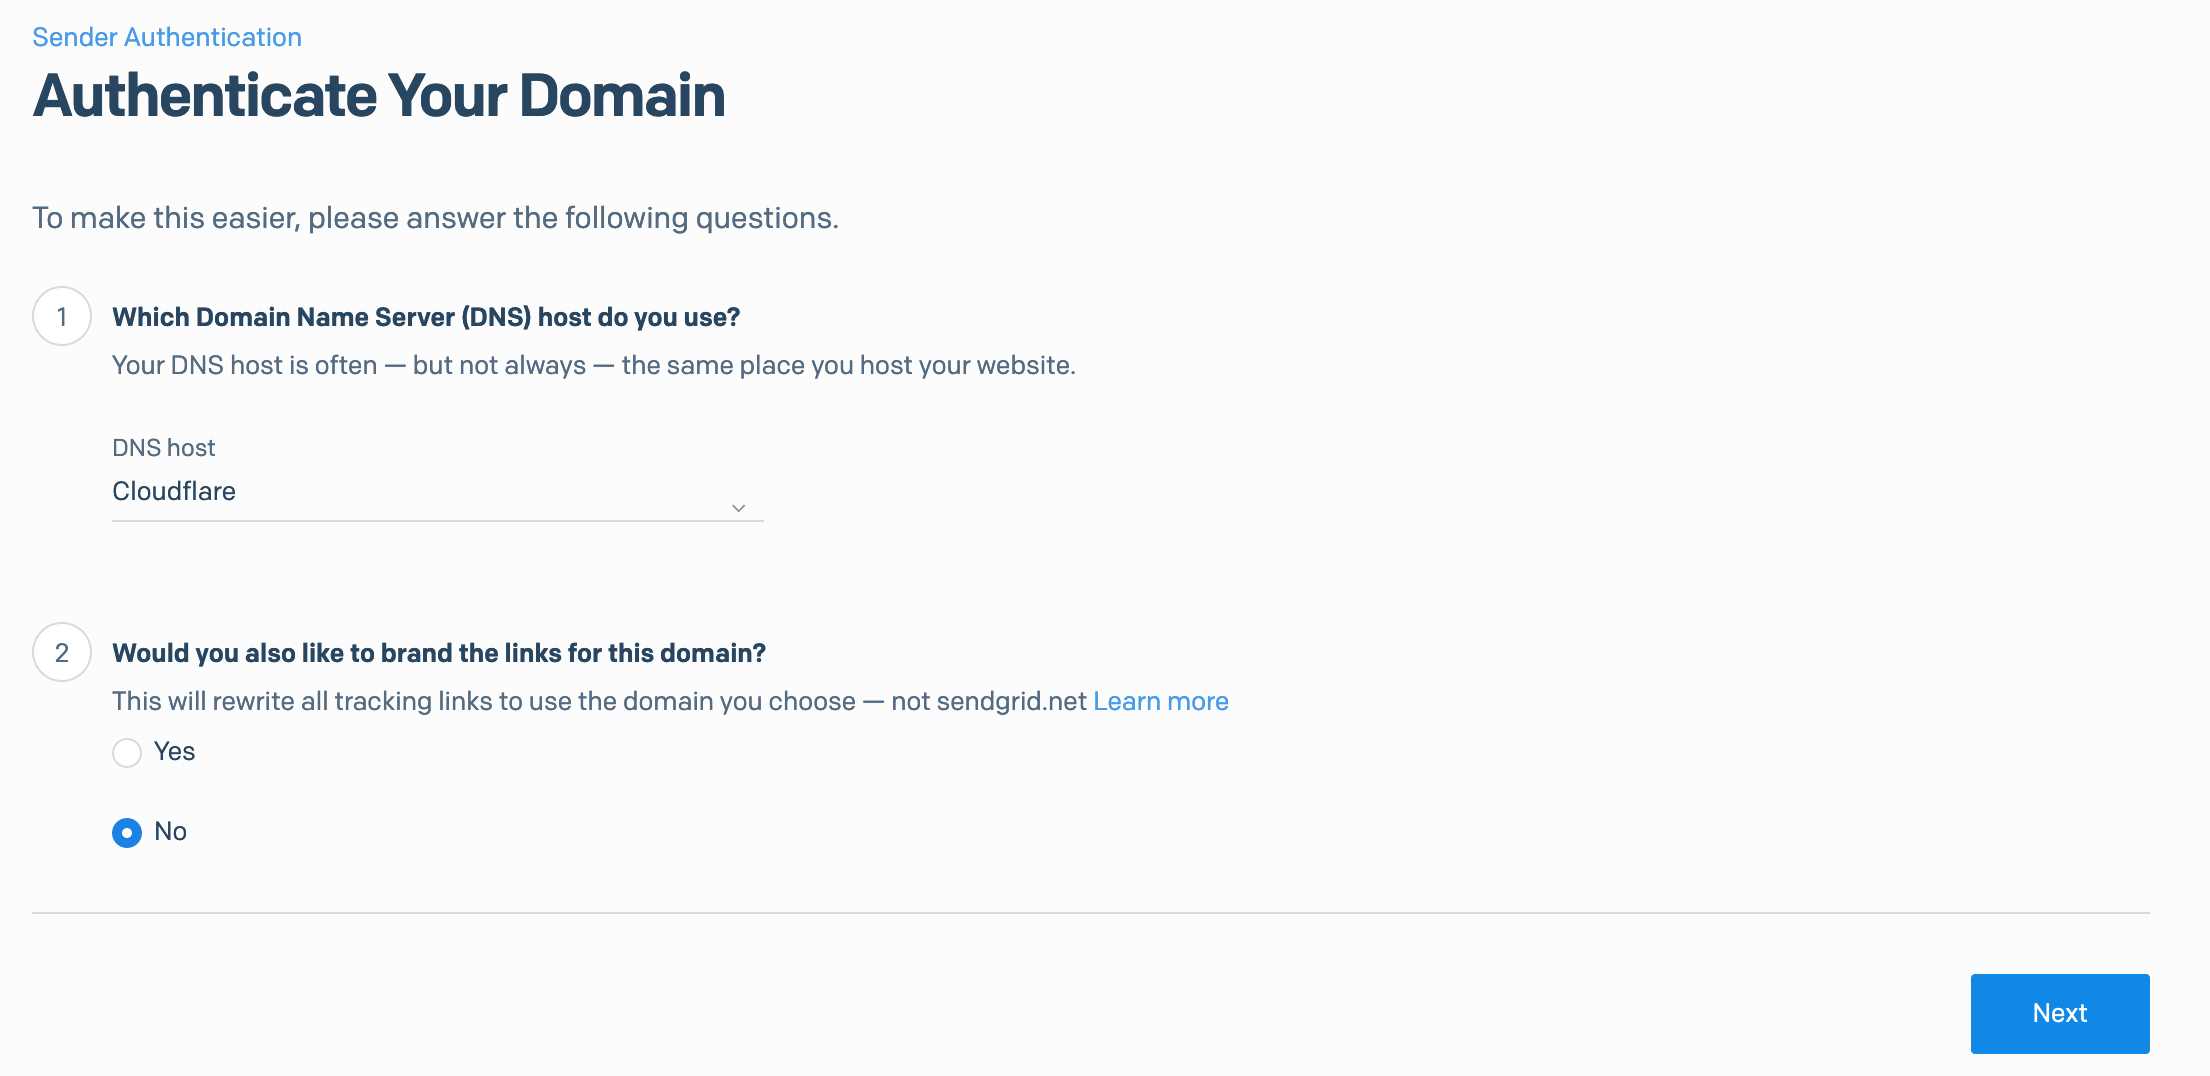
To start the process you can go through the easy to follow wizard to authenticate your domain - simply click the Authenticate Your Domain button.
My DNS host is Cloudflare so I've selected that, click no to rewriting branded links as all your emails will then go out with links rewritten to your domain name which looks very spammy for a one-to-one email.
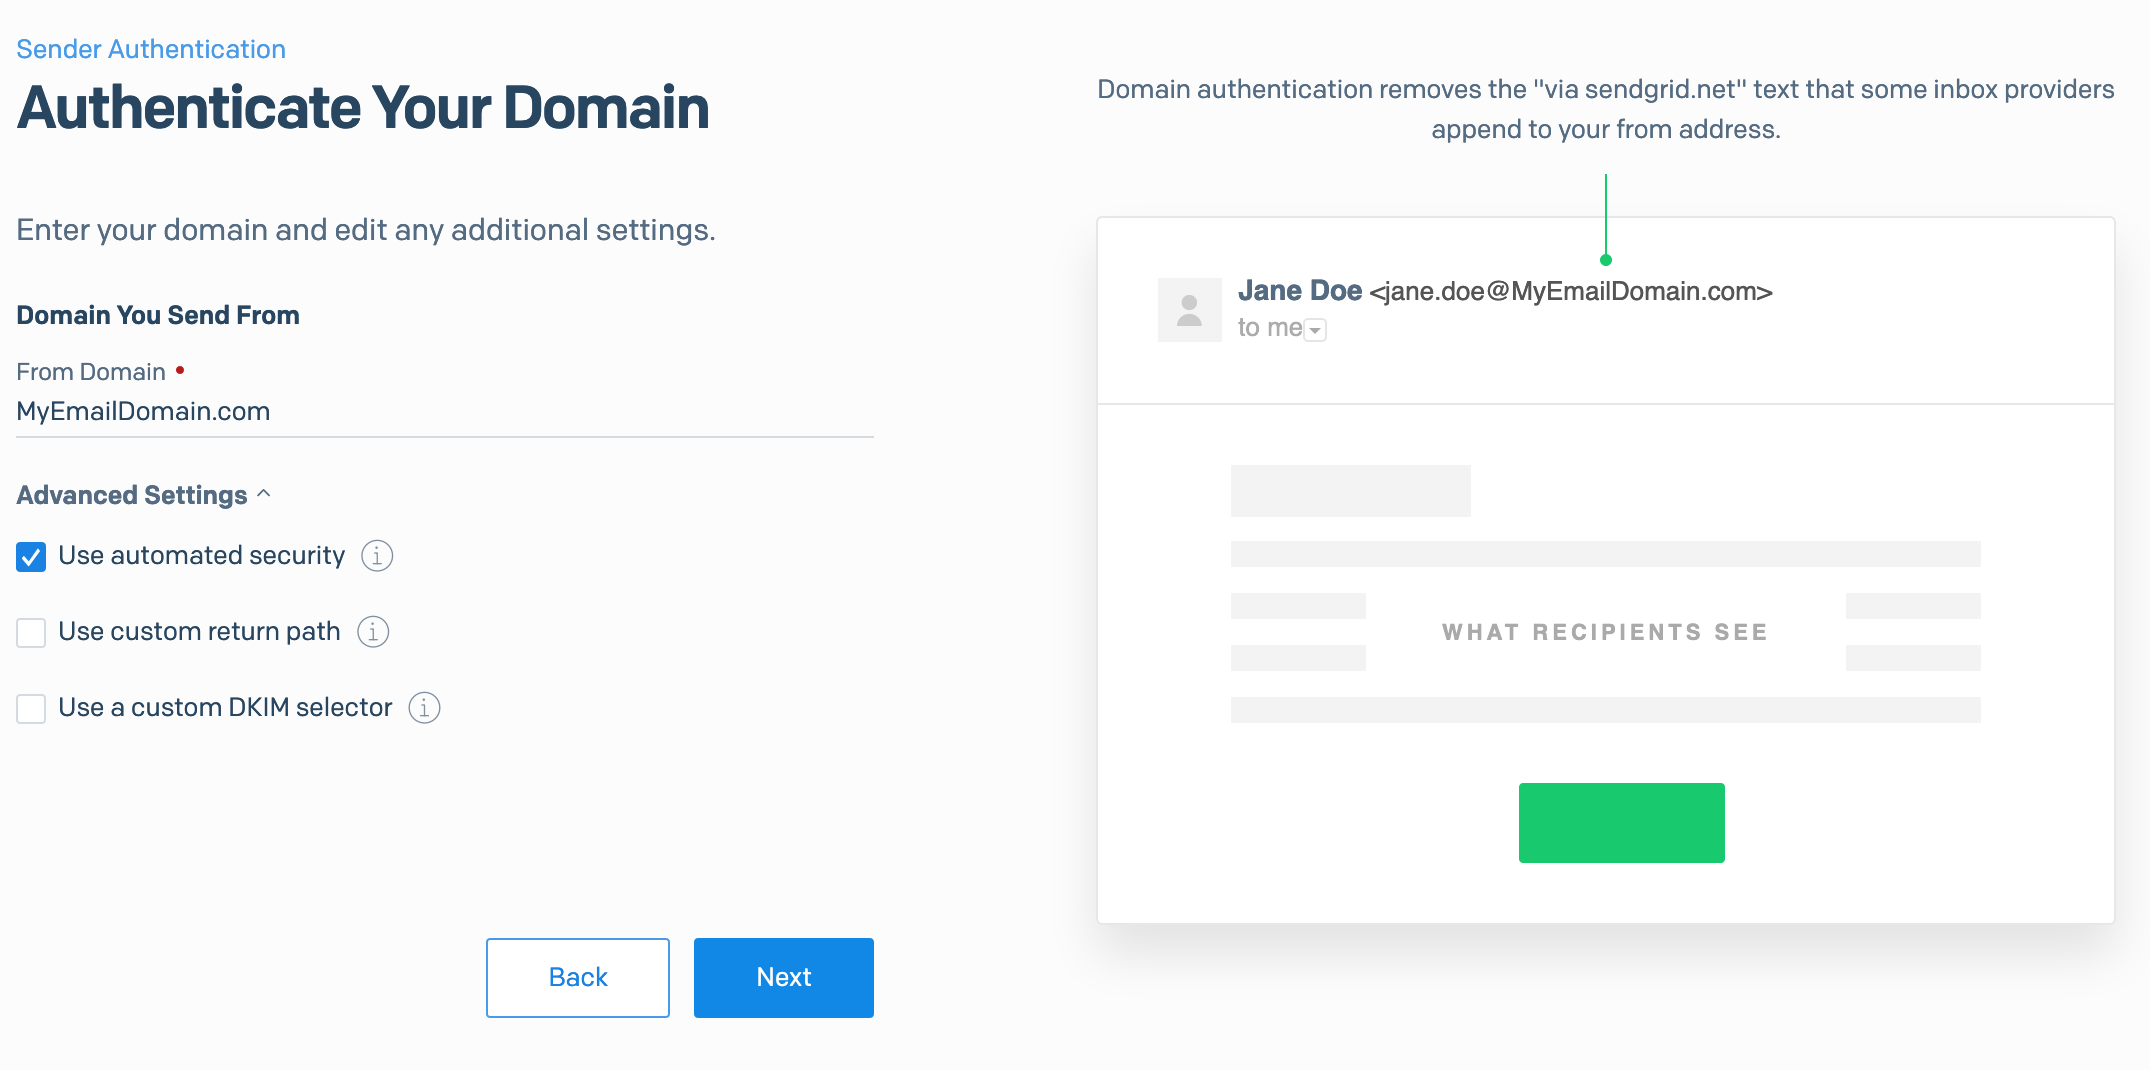
The next step is to add your email domain in, this isn't your MailCow domain but the domain that you want to send email from in your mailbox. Leave all relevant checkboxes to their default values unless you would like to add custom DKIM selectors and return path.
It's advisable to leave these options as their default if you don't know what they do.
The next part is to set up the DNS entries as advised, once you have added them it can take up to 24 hours to propagate but I've usually seen these changes take effect within a few minutes.
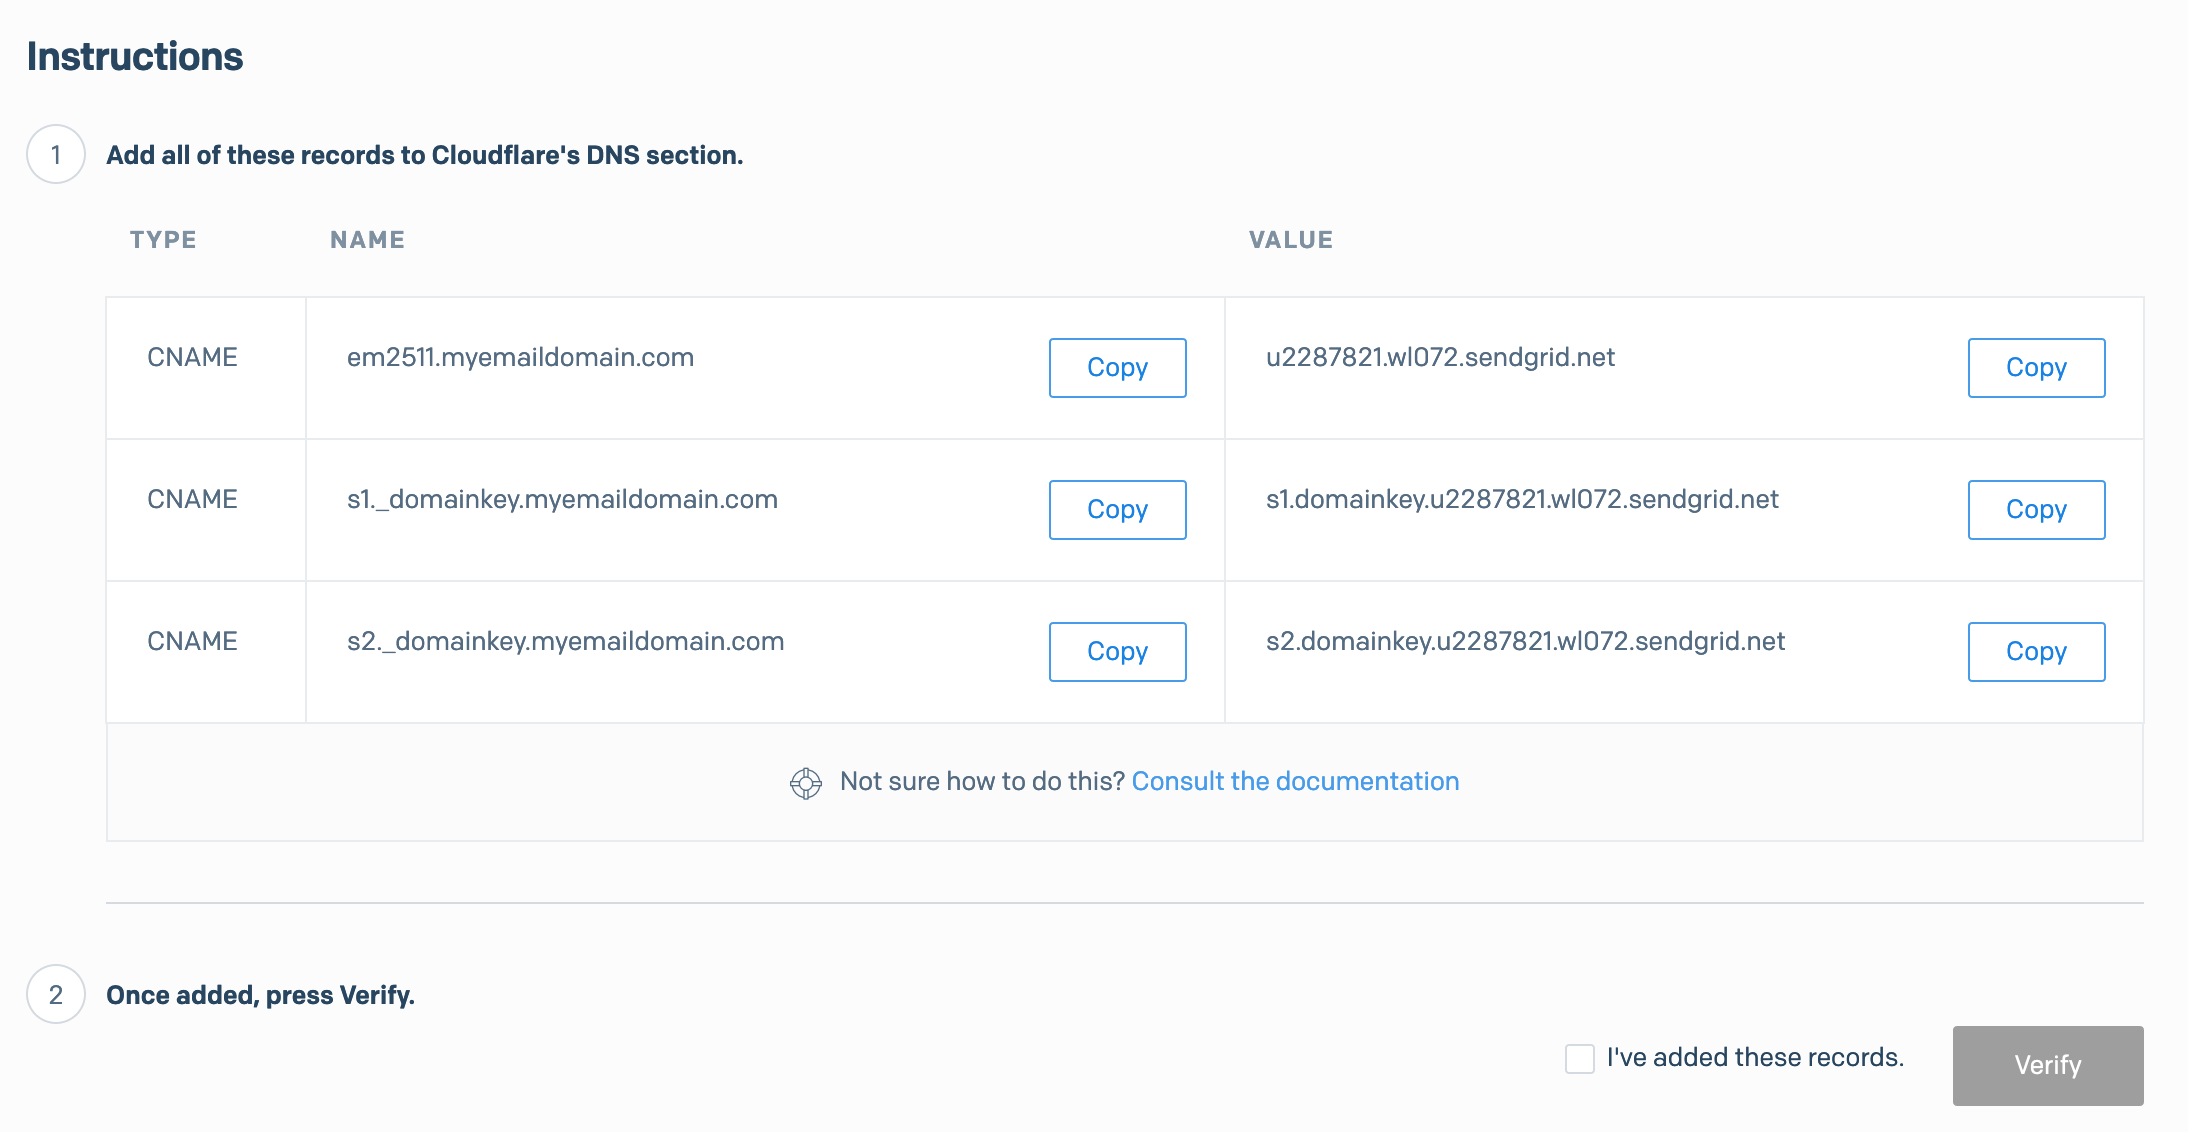
Once verified your domain will be listed and authenticated to send email.
One thing the wizard doesn't show it the requirement to add SPF records to your DNS. The SPF record will tell the receiving mailbox which domains are authenticated for you to send mail from, if SendGrid's domain isn't listed then it could be a spam trigger.
You most likely would have created an SPF TXT record when configuring MailCow so you can easily just modify the entry to include SendGrid's domain.
Below is a sample of what the entry could look like, the include:sendgrid.net is the key piece of info here.
v=spf1 mx include:mailcowdomain.com include:sendgrid.net ~allGenerate an API Key
For authentication SendGrid gives you the ability to use API Keys rather than defining your account password. This gives you more control on what applications are using SendGrid and allows you to revoke these apps within the App dashboard.
Navigate to Settings > API Keys and create a new API Key labeled MailCow - make a copy of the key as we'll be using it in MailCow.

Make sure that the Mail Send permission is added or you'll have problems later.

Now that we have the SendGrid side set up we need to configure the MailCow side.
MailCow
Setting up an SMTP relay in MailCow is super straightforward and that's what I love about the suite, especially when it comes to multiple domains - imagine doing this by modifying POSTFIX config files!
Log in to your MailCow admin interface and ensure you are in the Configuration & Details section - then click in to the tab labeled Routing. You'll notice the header Sender-dependent transports. This is where SMTP relays are added.
To set up your first transport simply enter the SMTP details for SendGrid in to the first section. You'll need the API Key generated from SendGrid in this step.
Host: smtp.sendgrid.net:587
Username: apikey
Password: API_KEY_HERE
Now click the Test button and enter the full email address you have created a mailbox for.
If all goes well you will receive a response message from the server indicating a success
SERVER -> CLIENT: 250 2.0.0 Ok: queued as A093B401D4Setting up the domain relay settings
The final part of this setup is to assign the newly created relay to your domain - again, this is super straightforward in MailCow.
Go to Mail Setup and under the Domains tab click edit next to the domain you want to modify.
There will be an option for Sender-dependent transports - click in to the dropdown and select the SendGrid relay we had set up.

Once complete, click save at the bottom of the page.
You're done! Any emails sent from the domain you have added the Sender Transport to will route through SendGrid, you can analyse the email headers to see if SendGrid is being used, below is an example
Received: from mailserver.com (unknown)
 by ismtpd0005p1lon1.sendgrid.net (SG) with ESMTP id qE8Qk_m8Sz29bFJPXf3sQ
 for <[email protected]>; Fri, 05 Jun 2020 11:55:10.645 +0000 (UTC)
