WPF introduces a new design pattern called MVVM (Model-View-View-Model), The MVVM pattern includes three key parts:
- Model (Business rule, data access, model classes)
- View (User interface (XAML))
- ViewModel (Agent or middle man between view and model)
You can read up more of the design pattern on a nice article found at MSDN Blogs.
The first thing to do is open up Visual Studio and create a new WPF Desktop application so you’re starting off with a blank canvas.
Go ahead in your MainWindow.xaml file and add a DataGrid in your Grid
<Grid>
    <DataGrid />
</Grid>
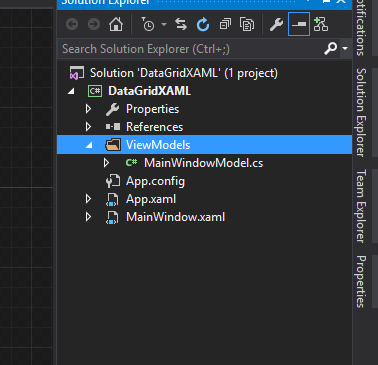
Now we need to go ahead and create a new class file – this is going to be our ViewModel. I like to put all View Models in to a folder named “ViewModels” smart, right!
So create the ViewModels folder and also create a new .cs file called MainWindowModel.cs

Moving on, let’s create an Entities folder with a class called Phone.cs – this file will be the schema for our DataGrid, all the fields that we want shown in the DataGrid will be defined in this file. You can use the code below as a base for this example.
public class Phone : INotifyPropertyChanged
{
    private string _manufacturer;
    private string _model;
    private string _os;

    public string Manufacturer
    {
        get { return _manufacturer; }
        set
        {
            _manufacturer = value;
            OnPropertyChanged();
        }
    }

    public string Model
    {
        get { return _model; }
        set
        {
            _model = value;
            OnPropertyChanged();
        }
    }

    public string OS
    {
        get { return _os; }
        set
        {
            _os = value;
            OnPropertyChanged();
        }
    }

    public event PropertyChangedEventHandler PropertyChanged;

    protected virtual void OnPropertyChanged([CallerMemberName] string propertyName = null)
    {
        PropertyChanged?.Invoke(this, new PropertyChangedEventArgs(propertyName));
    }
}
I have added three fields
- Manufacturer
- Model
- OS
These fields will be shown in our DataGrid – you probably have also noticed OnPropertyChanged(). I have inherited the INotifyPropertyChanged interface that will allow the code to update the UI without the need to refresh the whole view.
We’ve got our ViewModel and Entity all set up, now we need to define a collection in the ViewModel. I’ll be using the ObservableCollection for binding the user interface with the list of Phones.
Create another class called Phones.cs – this will hold the collection we’ll use for the DataGrid.
public static class Phones
{
    private static ObservableCollection<Phone> _phones = new ObservableCollection<Phone>();

    public static ObservableCollection<Phone> Collection
    {
        get { return _phones; }
    }

}
I’ve created a new ObservableCollection with the Type as our Phone class, as you can see I’ve created this to be a static class.
Our MainWindowModel.cs file is looking lonely here, there’s nothing in it, let’s add some code.
public class MainWindowModel
{
    private ObservableCollection<Phone> _phones = Phones.Collection;

    public ObservableCollection<Phone> PhoneCollection
    {
        get { return _phones; }
        set
        {
            _phones = value;
        }
    }
}
We’re almost there now, go back to MainWindow.xaml and we’re going to define our MainWindowModel in our XAML code.
<Window x:Class="DataGridXAML.MainWindow"
    xmlns="http://schemas.microsoft.com/winfx/2006/xaml/presentation"
    xmlns:x="http://schemas.microsoft.com/winfx/2006/xaml"
    xmlns:d="http://schemas.microsoft.com/expression/blend/2008"
    xmlns:mc="http://schemas.openxmlformats.org/markup-compatibility/2006"
    xmlns:local="clr-namespace:DataGridXAML"
    xmlns:viewModels="clr-namespace:DataGridXAML.ViewModels"
    mc:Ignorable="d"
    Title="MainWindow" Height="350" Width="525">

<Window.Resources>
    <viewModels:MainWindowModel x:Key="MainWindowModel" />
</Window.Resources>

<Grid>

    <DataGrid />

</Grid>
Take note that we’ve added a viewModels namespace and defiend our MainWindowModel in the Resources for the Window.
Now we just need to tell the DataGrid what Collection is should get its data from – our ObservableCollection.
<Grid DataContext="{Binding Source={StaticResource MainWindowModel}}">
    <DataGrid ItemsSource="{Binding PhoneCollection}" />
</Grid>
Just to take you through both changes here
- The Grid’s Data Context has been changed and assigned to the ViewModel – the reason we need to do this is to tell all child elements that they should be looking at the MainWindowModel for our data source.
- The ItemsSource on the DataGrid – as you’ve noticed the ItemsSource is binded to our PhoneCollection, this is the same name of the ObservableCollection that we had defined in MainWindowModel.cs
Wrapping It Up
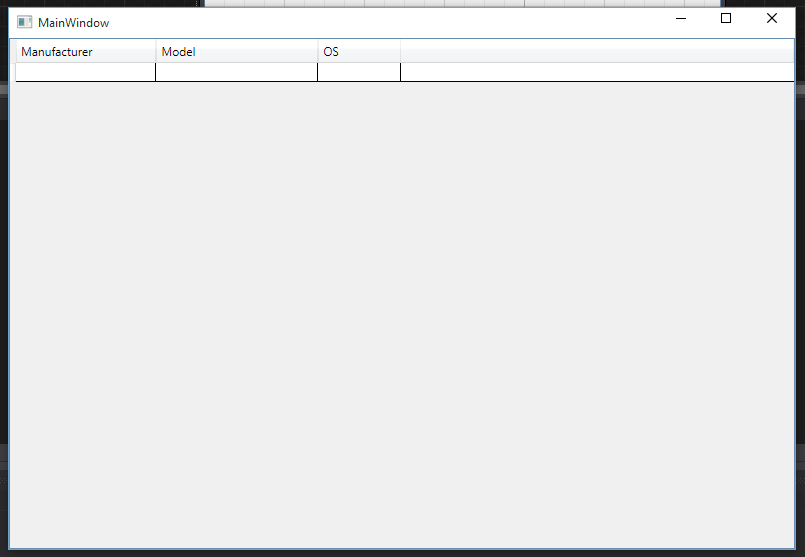
We’re almost there now, if you decide to run your application now you’ll notice the fields from the Phone Entity are showing in the DataGrid. You never manually entered the column names they just showed up based off your schema.

Nothing’s fun if there’s no data in the grid, so let’s go ahead and create some. Just to speed up the process here for testing you can add the follow code in the constructor of your MainWindow.xaml.cs file.
public MainWindow()
    {
        InitializeComponent();

        Phones.Collection.Add(new Phone { Manufacturer = "Apple", Model = "iPhone", OS = "iOS"});
        Phones.Collection.Add(new Phone { Manufacturer = "Samsung", Model = "Galaxy S4", OS = "Android" });
        Phones.Collection.Add(new Phone { Manufacturer = "Google", Model = "Nexus 4", OS = "Android" });
    }
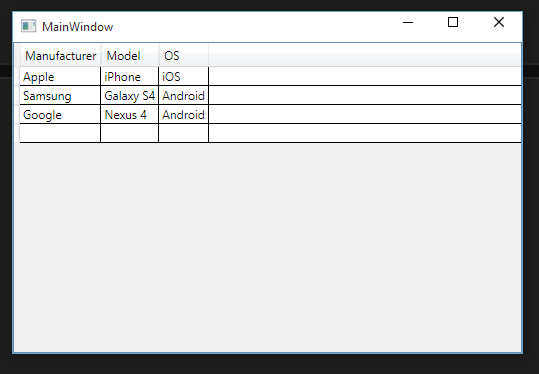
Once you’ve made that change, run your application again – you’ll notice the values you created above are shown in the DataGrid.

You’ve accomplished this without the need to write code that interacts with the DataGrid directly. You’re working on a data set that’s being read by your user interface.
We’ve already included code in the entity for you to change the values of the row, I’ll leave that to you to work on.
